🧩 Introduction: Why Build a Rust Pathfinding Game?
Have you ever played a game where a character needs to find their way through a maze? Maybe they’re trying to escape a dungeon, find hidden treasure, or avoid traps. These games are not only exciting—they’re also a great way to learn how computers think.
When we build a Rust pathfinding game, we’re teaching the computer how to solve a problem step by step, just like how you would find your way out of a maze. But instead of walking and looking around with your eyes, the computer follows instructions called algorithms. Algorithms are like recipes—they tell the computer exactly what to do in what order.
📚 Why Use Rust?
Rust is a programming language that is super fast and super safe. It helps you write code that doesn’t crash or make silly mistakes. That’s why many programmers love Rust, especially when learning how to solve problems with algorithms. By making a Rust pathfinding game, you’re not only having fun—you’re also getting smarter at solving puzzles and writing clean, reliable code.
🤖 What is Pathfinding?
Pathfinding means finding the best way from one place to another. Imagine you’re in a maze and trying to get to the exit. You can go left, right, up, or down, but some paths are blocked. You have to figure out which path leads you out.
Computers do the same thing using special techniques like:
- BFS (Breadth-First Search): Try all the close paths first, then go farther
- DFS (Depth-First Search): Go as deep as possible before turning back
These are called pathfinding algorithms, and we’ll use them in our Rust pathfinding game.
🧠 Why Does It Matter?
If you want to get better at coding, especially at solving problems, learning algorithms is a must. And instead of learning them in a boring way, making a game helps you understand how they actually work. You can see the algorithm in action, watch the computer “think,” and even make it smarter.
When you finish building your own Rust pathfinding game, you’ll have learned:
- What algorithms are, and how they help solve problems
- How computers move through maps and mazes
- Why Rust is great for building games and systems that need to be fast and safe
Table of Contents
🕹️ Game Overview: What Are We Building?
Now that we know why learning algorithms is important, let’s talk about what we’re actually going to make in this fun Rust project. We’re going to build a Rust pathfinding game—a maze escape game that runs in your terminal, using just text.
It may not have pictures or animations, but don’t worry! You’ll get to see how smart your code can be when you teach the computer how to think.
🎮 What Kind of Game Is This?
This Rust pathfinding game is a text-based maze explorer. That means everything you see will be made of letters and symbols—no drawings, just your imagination and logic!
Let’s picture it like this:
@ . . # #
# . # . #
# . # . #
# . . . X
@→ That’s you, the playerX→ That’s the goal, the place you need to reach.→ These are open paths you can move through#→ These are walls that block your way
You’ll control the player using code, and you’ll tell the computer:
“Find the shortest way to the goal without walking into any walls.”
And guess what? The computer will do it all by itself using algorithms like BFS (Breadth-First Search) or DFS (Depth-First Search)!
🧠 What’s the Computer Actually Doing?
When you write a Rust pathfinding game, you’re teaching the computer to:
- Look at all the possible directions it can go
- Avoid walls or places it already visited
- Keep track of the shortest way to reach the goal
- Return that path to you so you can see how it escaped
This is just like when you walk through a maze, but the computer does it much faster—and it never gets tired.
This is what programmers call a search algorithm—and you’re about to build one with your own hands.
🧩 What Will Be in Our Rust Pathfinding Game?
Let’s look at the parts we’ll build together:
| Part | What It Does |
|---|---|
| Maze Map | A 2D grid of characters like @, #, . and X |
| Player | The character trying to find the goal |
| Goal | The exit the player needs to reach |
| Walls | Obstacles the player cannot walk through |
| Pathfinder | The smart part of the game—it calculates the best path |
| Terminal Output | Shows the maze and the path in your terminal screen |
This is a great project because you get to:
- Visualize algorithms (watch them think!)
- Learn how to represent maps with arrays
- Build a real working game with only code and logic
🧰 What You Need to Get Started
Don’t worry, you don’t need any fancy computer or game engine.
Here’s all you need to start building your very own Rust pathfinding game:
- 🖥️ A computer with Rust installed
- 📄 A text editor (like Visual Studio Code or even just Notepad++)
- 🧠 Your brain, ready to learn and solve puzzles
- 😃 And a little patience and curiosity
Even if you’ve never made a game before, this guide will walk you through everything step-by-step. You don’t need to be a Rust expert—we’ll learn together as we go.
✨ Why This Game Is Special
This Rust pathfinding game is more than just a project—it’s a great way to build your algorithm brain. You’ll come out of this experience knowing:
- How to think like a computer
- How to build your own maze solver
- How Rust makes your code safe and fast
- And how fun it can be to learn algorithms through real games
🔧 Setup: Preparing Your Rust Pathfinding Game Project
Welcome! You’re now just a few steps away from starting your very own Rust pathfinding game.
In this part, we’re going to get everything ready so that we can build our maze game without any problems.
Think of it like this: if you were going to paint a picture, you’d first grab your paper, brushes, and paints. We’re doing the same thing here—but for code!
🧑💻 First of All… Do You Have Rust Installed?
To build a Rust pathfinding game, we need the Rust programming language installed on your computer.
But don’t worry! If you’re not sure how to do that, there’s a very easy guide that shows you everything step-by-step with pictures.
Just follow this link:
👉 How to Set Up Rust on Windows (Beginner-Friendly Guide)
Once you finish that, you’ll have Rust installed and ready to go!
Come back here when you’re done 😊
📁 Step 1: Let’s Make a New Project Folder
Now that you have Rust ready, let’s make a brand new folder just for our game.
This is like making a special box to keep all your tools and drawings in one place.
- First, open something called the Terminal.
(On Windows, you can search for “Command Prompt” or “PowerShell”.) - Then type this special command: cpp복사편집
cargo new rust-pathfinding-gameThis tells Rust:
“Hey, make me a new game project called rust-pathfinding-game.” - After a second or two, it will say something like: go복사편집
Created binary (application) `rust-pathfinding-game` package - Now go into your new game folder by typing: bash복사편집
cd rust-pathfinding-game
🎉 Awesome! You just created your very first Rust project.
📦 What’s Inside the Project Folder?
When you open your folder, you’ll see a few files and folders. Here’s what they do:
| File or Folder | What It’s For |
|---|---|
Cargo.toml | This is your project’s “info card.” It tells Rust the name of your game and any extra tools you want to add later. |
src/main.rs | This is the main file where you’ll write your game code. Think of it as the brain of your Rust pathfinding game. |
Don’t worry—you’ll learn how all of this works step-by-step.
✏️ Step 2: Open the Project in a Code Editor
You need a place to write and see your code.
Think of it like a notebook for programmers.
We recommend using Visual Studio Code (VS Code) because it’s:
- Free
- Simple
- Smart enough to help you as you type
Here’s what to do:
- Open VS Code
- Click on File → Open Folder
- Find and choose the folder named
rust-pathfinding-game - Click OK or Open
Now you should see a list of files on the left (like src, Cargo.toml)
Click on src, then main.rs to open the file where we’ll start writing our maze game!
🧪 Step 3: Let’s Make Sure It Works
Before we write the game, let’s test everything to be sure Rust is working properly.
- Inside the
main.rsfile, change the code to this: rust복사편집fn main() { println!("Hello, Rust Pathfinding Game!"); } - Save the file. (You can press Ctrl + S or click “File → Save”)
- Now go back to the terminal and type: arduino복사편집
cargo run - If everything is working, you’ll see: 복사편집
Hello, Rust Pathfinding Game!
🎉 Yes! Your project is working perfectly, and you’re ready to build your Rust pathfinding game!
✅ Recap: What You Just Did
Let’s quickly review what we’ve done:
| Step | What You Did |
|---|---|
| Created a project | You used cargo new to make a folder for your game |
| Entered the folder | You used cd to go inside your game’s home |
| Opened it in VS Code | So you can easily write your code |
| Ran your first command | You typed cargo run and saw it work! |
This may seem small, but it’s a big first step toward building a real, working maze game that thinks like a robot.
🧱 Building the Maze: How to Create the Grid Map
To build a fun and smart Rust pathfinding game, we first need to make something very important: the maze.
A maze is like a puzzle of paths and walls. Some places you can walk through, and others are blocked. If we want our game to find the best way from start to finish, we need to show the computer where it can and can’t go.
But how do we draw a maze using code?
Let’s find out!
🗺️ What Is a Grid Map?
Imagine you are looking at a maze from above, like a map. The maze is made of little squares. Each square can be one of these:
| Symbol | Meaning |
|---|---|
@ | The player (where you start) |
X | The goal (where you want to go) |
. | An open space you can move into |
# | A wall you cannot go through |
Let’s look at a small example:
@ . . # #
# . # . #
# . # . #
# . . . X
This is how our game will see the maze. Each line is a row, and each symbol is a square.
This type of structure is called a 2D grid or 2D array.
🧠 How the Computer Understands the Maze
Computers don’t see the map as symbols. They see numbers and data in a list of lists.
Here’s what the same maze would look like in Rust code:
let maze = vec![
    vec!['@', '.', '.', '#', '#'],
    vec!['#', '.', '#', '.', '#'],
    vec!['#', '.', '#', '.', '#'],
    vec!['#', '.', '.', '.', 'X'],
];
Let’s break that down:
vec!is how we make a list in Rust.vec![…]inside it means each row.- Each row has characters like
'@','.','X', or'#'. - Altogether, this makes a grid of 4 rows and 5 columns.
This is the map that your Rust pathfinding game will use to move the player and find the goal!
🔄 How the Player Will Move
We’ll later write a function that helps the player “walk” through the maze, one step at a time.
The player can move in 4 directions:
- Up
- Down
- Left
- Right
We’ll use BFS or DFS to let the computer try each path until it finds the way to the X.
But for now, our job is to:
- Build the maze grid
- Place the player (
@) and goal (X) - Make sure the map is easy to change later
You can even try building a few maps to test different shapes and sizes!
🛠️ Add the Maze to Your Code
Open your main.rs file and replace the old code with this:
fn main() {
    let maze = vec![
        vec!['@', '.', '.', '#', '#'],
        vec!['#', '.', '#', '.', '#'],
        vec!['#', '.', '#', '.', '#'],
        vec!['#', '.', '.', '.', 'X'],
    ];

    for row in &maze {
        for cell in row {
            print!("{} ", cell);
        }
        println!();
    }
}
Now run the game:
cargo run
You should see this output:
@ . . # #
# . # . #
# . # . #
# . . . X
🎉 You’ve just drawn your first maze with Rust!
💡 Why This Is Important
This may look simple, but it’s one of the most important parts of the entire Rust pathfinding game.
Why?
Because every move the computer makes depends on:
- What’s around the player
- Whether it’s allowed to move in that direction
- Whether the goal has been reached
Once the maze is ready, we’ll start coding the algorithm that lets the player think and move smartly.
🚶 Finding the Way: Implementing BFS in Rust
We’ve already built a maze using a grid. We can see where the player starts (@), where the goal is (X), and which paths are blocked (#).
But right now, our game doesn’t know how to move. It doesn’t know how to find its way through the maze.
That’s what we’re going to teach it now—with the help of an algorithm called BFS, or Breadth-First Search.
🔍 What Is BFS? (Breadth-First Search)
Let’s pretend your character is walking through the maze with a flashlight.
BFS works like this:
- First, check the squares right next to you (up, down, left, right).
- If the goal (
X) is not there, take one step further out. - Keep going step by step—like throwing a net farther and farther—until the goal is found.
- BFS always finds the shortest path first!
In short, BFS is like saying:
“Try all the close spots first. Then go farther. Never rush deep without exploring everything nearby.”
Perfect for mazes, right?
📦 Let’s Prepare the Code for BFS
We need a few things before we write BFS:
- A way to keep track of where we’ve been
- A queue (a list of places to explore)
- Directions we can move (up, down, left, right)
- A way to know when we’ve found the goal
✏️ Step-by-Step Code to Add BFS
Open your main.rs and update it like this (we’ll explain every part after):
use std::collections::VecDeque;

fn main() {
    let maze = vec![
        vec!['@', '.', '.', '#', '#'],
        vec!['#', '.', '#', '.', '#'],
        vec!['#', '.', '#', '.', '#'],
        vec!['#', '.', '.', '.', 'X'],
    ];

    let rows = maze.len();
    let cols = maze[0].len();

    let mut visited = vec![vec![false; cols]; rows];
    let mut queue = VecDeque::new();

    // Find starting point '@'
    for i in 0..rows {
        for j in 0..cols {
            if maze[i][j] == '@' {
                queue.push_back((i, j));
                visited[i][j] = true;
            }
        }
    }

    // Directions: (row_change, col_change)
    let directions = [(-1, 0), (1, 0), (0, -1), (0, 1)];

    while let Some((r, c)) = queue.pop_front() {
        if maze[r][c] == 'X' {
            println!("🎉 Found the goal at ({}, {})!", r, c);
            return;
        }

        for (dr, dc) in directions {
            let new_r = r as isize + dr;
            let new_c = c as isize + dc;

            if new_r >= 0 && new_r < rows as isize &&
               new_c >= 0 && new_c < cols as isize {
                let (nr, nc) = (new_r as usize, new_c as usize);
                if !visited[nr][nc] && maze[nr][nc] != '#' {
                    visited[nr][nc] = true;
                    queue.push_back((nr, nc));
                }
            }
        }
    }

    println!("😢 Could not find the goal.");
}
🧠 What This Code Does
| Part | Explanation |
|---|---|
VecDeque | This is a special list used as a queue (first-in, first-out) |
visited | Keeps track of places we already checked |
directions | Tells the computer how to move in 4 directions |
queue.push_back() | Adds a new spot to explore |
queue.pop_front() | Checks the next closest square |
if maze[r][c] == 'X' | Yay! We found the goal! |
🧪 Try Running the Game Now
cargo run
You should see something like:
🎉 Found the goal at (3, 4)!
That means BFS worked, and your Rust pathfinding game now has a brain!
📌 Summary: What We Learned in This Section
- We used Breadth-First Search (BFS) to find the shortest path in a maze
- We taught the computer how to think step-by-step
- We explored new squares using a queue
- We learned how to move up/down/left/right with code
좋아요! 😄
이제 다음 섹션 **“🧠 Visualizing the Path: Show the Route in the Maze”**을 시작합니다.
앞에서는 컴퓨터가 BFS 알고리즘으로 길을 찾을 수 있도록 만들었고, 이제는 그 길을 실제로 눈에 보이게 출력하는 작업을 해볼 거예요.
이 섹션은 우리가 만든 Rust pathfinding game을 훨씬 더 흥미롭고 똑똑하게 만들어줍니다.
이번에도 초등학생도 이해할 수 있도록 천천히, 친절하게 설명드릴게요.
🧠 Visualizing the Path: Show the Route in the Maze
Our game is almost ready!
In the last step, we made our Rust pathfinding game smart. It can now search through a maze and find the goal all by itself using BFS. 🎉
But there’s one problem…
We can’t see the path it took.
Let’s fix that!
Now we’re going to draw the path the computer found, right inside the maze.
This means we’ll show the player exactly how the character moved from @ to X.
🧭 How Do We Show the Path?
We’ll do it by:
- Remembering where we came from at each step
- Re-tracing the path once we find the goal
- Marking the path with a special symbol like
*
So the maze might look like this after solving:
@ * * # #
# * # . #
# * # . #
# * * * X
Cool, right? Let’s make it happen with code!
🧩 Step 1: Track Where We Came From
We’ll add a special 2D map called parent that remembers which square we came from to reach each point.
let mut parent = vec![vec![None; cols]; rows];
This tells the computer:
“If we got to (3,4), we must have come from (3,3). Remember that!”
We’ll update this in our BFS loop:
parent[nr][nc] = Some((r, c));
So every square remembers its “parent”—where it came from.
🧩 Step 2: When We Find the Goal, Trace the Path Backward
When BFS finds the goal (X), we’ll walk backward through the parent map until we reach the start.
We’ll collect all the steps into a list called path.
Here’s the full new version of the BFS section:
use std::collections::VecDeque;

fn main() {
    let mut maze = vec![
        vec!['@', '.', '.', '#', '#'],
        vec!['#', '.', '#', '.', '#'],
        vec!['#', '.', '#', '.', '#'],
        vec!['#', '.', '.', '.', 'X'],
    ];

    let rows = maze.len();
    let cols = maze[0].len();

    let mut visited = vec![vec![false; cols]; rows];
    let mut parent = vec![vec![None; cols]; rows];
    let mut queue = VecDeque::new();

    let mut goal = (0, 0);

    // Find start
    for i in 0..rows {
        for j in 0..cols {
            if maze[i][j] == '@' {
                queue.push_back((i, j));
                visited[i][j] = true;
            }
        }
    }

    let directions = [(-1, 0), (1, 0), (0, -1), (0, 1)];

    while let Some((r, c)) = queue.pop_front() {
        if maze[r][c] == 'X' {
            goal = (r, c);
            break;
        }

        for (dr, dc) in directions {
            let new_r = r as isize + dr;
            let new_c = c as isize + dc;

            if new_r >= 0 && new_r < rows as isize && new_c >= 0 && new_c < cols as isize {
                let (nr, nc) = (new_r as usize, new_c as usize);
                if !visited[nr][nc] && maze[nr][nc] != '#' {
                    visited[nr][nc] = true;
                    parent[nr][nc] = Some((r, c));
                    queue.push_back((nr, nc));
                }
            }
        }
    }

    // Reconstruct path
    let mut path = vec![];
    let mut current = goal;

    while let Some((r, c)) = parent[current.0][current.1] {
        if maze[r][c] == '@' {
            break;
        }
        path.push((r, c));
        current = (r, c);
    }

    // Mark path in maze
    for (r, c) in path {
        maze[r][c] = '*';
    }

    // Print updated maze
    for row in maze {
        for cell in row {
            print!("{} ", cell);
        }
        println!();
    }
}
✅ Output Example
If everything goes right, your terminal will now show:
@ * * # #
# * # . #
# * # . #
# * * * X
The * symbols show the exact path the player took from the start @ to the goal X.
📚 What You Learned
- How to track previous steps using a parent map
- How to retrace a path from goal to start
- How to update the maze with symbols to show movement
- You now have a fully working, visual Rust pathfinding game!
⚙️ Upgrades & Challenges: Make Your Rust Pathfinding Game Even Better
Congratulations! 🎉
You’ve built a fully working Rust pathfinding game that:
- Builds a maze
- Uses BFS to find the shortest path
- Shows the path with
*so you can see how the computer thinks
That’s amazing! But now, let’s level up.
Just like how games get more fun with power-ups, your project can get more exciting with new features and challenges.
✨ Upgrade 1: Random Maze Generator
Right now, the maze is always the same. Every time you run the game, it looks like this:
@ . . # #
# . # . #
# . # . #
# . . . X
What if the maze was different every time?
That’s called a random maze!
How to do it:
- Use Rust’s
randcrate to make random walls - Choose random start (
@) and goal (X) positions - Make sure there’s always a way to reach the goal!
🔍 Hint: You can use a function like this:
fn generate_random_maze(rows: usize, cols: usize) -> Vec<Vec<char>> {
    // Fill the grid with '.' and randomly replace some with '#'
    // Set one cell as '@' and another as 'X'
}
This will make your Rust pathfinding game more like a real adventure—always new, always challenging.
🎮 Upgrade 2: Real-Time Player Input
Wouldn’t it be cool if you could move the player manually, like in a real game?
You can use keyboard input so that you press:
Wto go upSto go downAto go leftDto go right
This makes the game interactive!
You’ll need to:
- Read input from the user (maybe with
std::io) - Move the player based on input
- Redraw the maze each time
👾 Challenge: Add “fog of war” so only nearby tiles are shown!
🧠 Upgrade 3: Add DFS (Depth-First Search)
We used BFS in our Rust pathfinding game because it always finds the shortest path.
But there’s another famous algorithm called DFS (Depth-First Search).
DFS goes as deep as it can first, even if it’s not the best path. Try it!
To try:
- Copy your BFS function and make a DFS version
- Compare the two:
- Which finds the goal faster?
- Which uses more steps?
- Which feels more “clever”?
🧪 This will help you understand how different algorithms think!
🏆 Challenge Mode: Obstacles, Traps, and Levels
Want to make the game more like a real dungeon?
Try adding:
- Traps: If the player steps here, they lose!
- Keys and Doors: Find the key first, then unlock the path to the goal
- Levels: Start with easy mazes, and make them harder each time
You’ll learn about:
- Game design
- State management
- More advanced Rust skills!
💬 Bonus Idea: Show Steps Taken
After solving the maze, print out:
- How many steps it took to reach the goal
- How many tiles were visited
- The full list of path coordinates
This makes your game feel smarter—and gives you a chance to learn about metrics and debugging.
🌱 What’s Next?
You just created something amazing:
- A game
- A pathfinder
- A working algorithm system
- All written in Rust, one of the most powerful programming languages today
But the best part?
You did it by learning one concept at a time.
That’s how real developers grow—by trying, building, and improving.
So what’s next?
Keep going! Try:
- Making your own levels
- Building a GUI version with
eguiortui-rs - Sharing your Rust pathfinding game on GitHub
And most of all—have fun while coding.
🧩 Final Thoughts
Building a Rust pathfinding game is more than just a coding project.
It’s a way to:
- Understand how algorithms work
- Visualize computer logic
- Improve your problem-solving skills
- Feel proud of something you built from scratch
Whether you’re 12 or 42, if you built this—you are a creator.
📦 Bonus: Wrap-Up & What’s Next for Your Rust Pathfinding Game
You’ve done it.
From a blank screen to a fully functional Rust pathfinding game, you’ve created something that thinks, moves, and solves problems—just like a real adventurer in a maze.
But this project is more than just code.
It’s a moment when your logic and creativity came to life on the screen.
💡 What Have You Learned?
Let’s take a moment to reflect on everything you’ve accomplished:
| Concept | What You Gained |
|---|---|
| Rust fundamentals | vec!, loops, conditions, pattern matching |
| Maze representation | Built a 2D grid using nested vectors |
| BFS algorithm | Learned how computers explore paths efficiently |
| Path reconstruction | Traced steps back using a parent map |
| Visualization | Displayed the found path using * |
| Problem-solving | Broke down big problems into small, logical steps |
You didn’t just learn Rust—you learned how to think like a problem-solver, and that’s a skill you’ll carry for life.
🧠 What’s Next?
Your Rust pathfinding game is already awesome—but there’s so much more you can do!
Try experimenting with:
- 🧭 Random mazes: Make each game different every time
- 🎮 Player-controlled movement: Use keyboard input for real-time control
- 🧠 New algorithms: Try DFS, Dijkstra, or A* and compare their results
- 🖥️ Better display: Build a terminal UI or even a web version
There are no rules—only possibilities.
Each new idea you try will level up your understanding and creativity.
💬 Final Thoughts
What may have felt confusing at first became clear, step by step, as you built your game.
That’s not just coding.
That’s learning.
That’s building.
That’s how real developers grow.
Your Rust pathfinding game is just the beginning.
Every time you open your terminal and type cargo run,
remember this simple truth:
“I built a maze solver with Rust. From scratch.”
You’re not just a learner anymore.
You’re a creator.
🌱 Keep going.
Build something new.
Try something scary.
And most importantly—have fun with it.
Whenever you’re ready to create your next adventure, Rust—and your imagination—will be right there waiting.
🙋 FAQ with Code: Rust Pathfinding Game
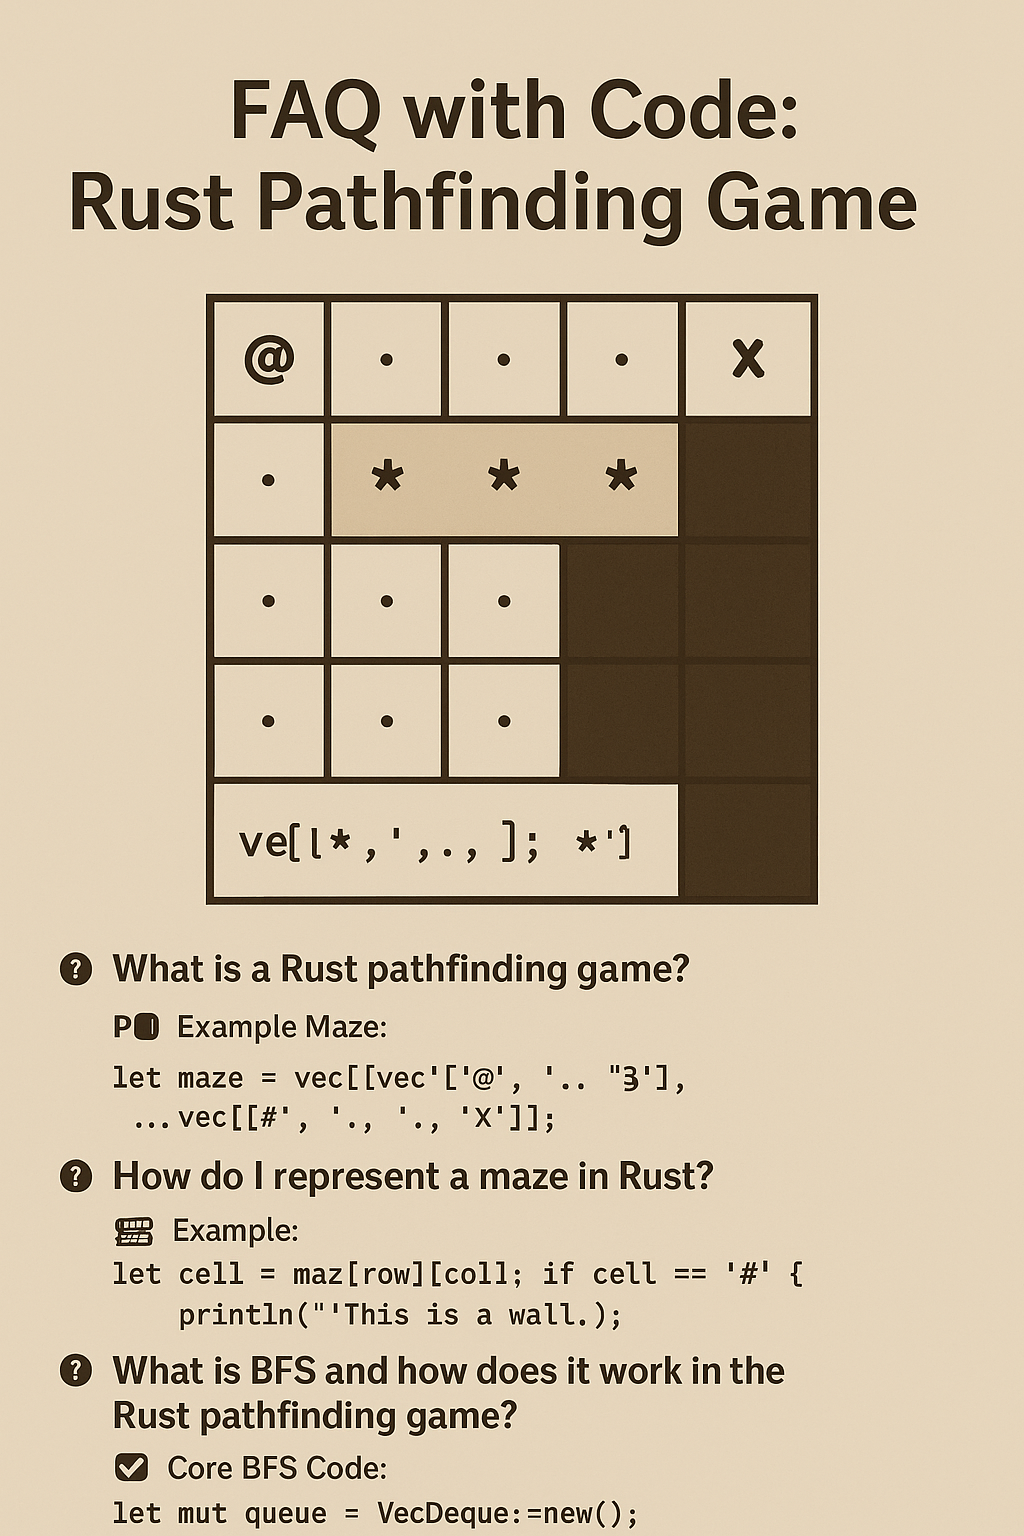
1. What is a Rust pathfinding game?
A Rust pathfinding game is a simple terminal game where a character (like @) tries to reach a goal (X) inside a maze using a smart algorithm like BFS.
📌 Example Maze:
let maze = vec![
    vec!['@', '.', '.', '#'],
    vec!['#', '.', '#', '.'],
    vec!['#', '.', '#', '.'],
    vec!['#', '.', '.', 'X'],
];
2. How do I represent a maze in Rust?
We use a 2D vector (Vec<Vec<char>>) where each character represents a tile in the maze.
🧱 Example:
let cell = maze[row][col];
if cell == '#' {
    println!("This is a wall.");
}
3. How do I find the start (@) and goal (X) positions?
You can use nested loops to scan the grid and store the coordinates.
🔍 Example:
let mut start = (0, 0);
for i in 0..maze.len() {
    for j in 0..maze[0].len() {
        if maze[i][j] == '@' {
            start = (i, j);
        }
    }
}
4. What is BFS and how does it work in the Rust pathfinding game?
BFS (Breadth-First Search) is a method that explores all nearby positions before going deeper—perfect for finding the shortest path in a maze.
🚶♂️ Core BFS Code:
let mut queue = VecDeque::new();
queue.push_back(start);
while let Some((r, c)) = queue.pop_front() {
    // Explore neighbors
}
5. How do I keep track of visited cells?
Use a 2D boolean array the same size as your maze to mark places you’ve already checked.
✅ Example:
let mut visited = vec![vec![false; cols]; rows];
visited[r][c] = true;
6. How can I remember the path back to the start?
Use a 2D parent array that stores the previous cell for each visited cell.
🧠 Path Tracking Example:
let mut parent = vec![vec![None; cols]; rows];
parent[nr][nc] = Some((r, c));
7. How do I draw the final path with * symbols?
After reaching the goal, walk backward using parent and mark the route.
✏️ Path Drawing Code:
let mut current = goal;
while let Some((r, c)) = parent[current.0][current.1] {
    if maze[r][c] == '@' { break; }
    maze[r][c] = '*';
    current = (r, c);
}
8. Can I make the maze random in the Rust pathfinding game?
Yes! Use the rand crate to randomly place walls (#) and open spaces (.).
🎲 Random Maze Cell:
use rand::Rng;
let mut rng = rand::thread_rng();
let tile = if rng.gen_bool(0.2) { '#' } else { '.' };
9. How can I make the player move with keyboard input?
Use std::io::stdin() to read characters like W, A, S, D and move the player manually.
⌨️ Keyboard Input Example:
use std::io::{self, Read};
let mut buffer = [0; 1];
io::stdin().read_exact(&mut buffer)?;
match buffer[0] as char {
    'w' => println!("Move up"),
    's' => println!("Move down"),
    _ => (),
}
10. Can I switch to DFS instead of BFS?
Absolutely. Replace the queue (VecDeque) with a stack (Vec) for Depth-First Search behavior.
🔄 DFS-style Search:
let mut stack = vec![start];
while let Some((r, c)) = stack.pop() {
    // DFS logic here
}
11. How do I count steps taken to reach the goal?
Just track the path length during BFS or after reconstructing the path.
📏 Count Steps:
let steps = path.len();
println!("Steps to goal: {}", steps);
12. What can I build next after the Rust pathfinding game?
Here are some fun next-level ideas:
- 🧭 Randomly generated dungeon explorer
- ⚔️ Pathfinding with monsters and traps
- 🎨 Terminal UI version with
tui-rs - 🌐 Web-based maze game using
YeworBevy
📘 Bonus Tip:
Try comparing multiple algorithms (BFS, DFS, A*) on the same maze!
🔗 External Sources for Further Reading
1. 🔧 Rust Official Book (The Rust Programming Language)
- 📘 Learn Rust from the official source, with clear examples and safety concepts.
- 🌐 https://doc.rust-lang.org/book/
2. 📊 Visualgo – Algorithm Visualization
- 🧠 BFS, DFS, and many other pathfinding algorithms explained visually.
- 🌐 https://visualgo.net/en/dfsbfs
3. 🧪 Pathfinding.js – Live Visualization of BFS, DFS, A*
- 💡 Try live demos of how pathfinding works in mazes. Great for comparing algorithms.
- 🌐 https://qiao.github.io/PathFinding.js/visual/
4. 🔍 Wikipedia – Breadth-First Search (BFS)
- 📚 Formal definition and real-world applications of BFS with diagrams.
- 🌐 https://en.wikipedia.org/wiki/Breadth-first_search
5. 📦 Crate: rand for Random Maze Generation in Rust
- 🎲 Rust’s official crate for generating random numbers, used in maze generation.
- 🌐 https://docs.rs/rand/latest/rand/